Showing posts with label Maya. Show all posts

Monday, January 16, 2012

3Drender - Lighting And Rendering In Maya: Lights And Shadows By Jeremy Birn


3Drender - Lighting And Rendering In Maya: Lights And Shadows By Jeremy Birn
English | MPEG-4 1024x768, 15fps | PCM, 44.1kHz, mono, 705Kbps | ISO |  Size 3.53 GB
Genre: Elearning

Great lighting is the key to getting professional-looking output from Maya and Mental Ray. Now, for the first time, Pixar Technical Director Jeremy Birn shares his secrets, his settings, and his Maya scenes, in a Maya-specific training DVD. This new DVD features over 3 hours of tightly edited demonstrations of professional lighting and rendering techniques using Maya and Mental Ray.

* Step-by-step lighting of full Maya scenes
* Simulated radiosity style lighting for realism and speed
* Every kind of Maya light and shadow explored in depth
* Hacks, tricks, cheats, and creative uses for light attributes
* Practical approaches to professional-looking color choices
* Ray-traced shadows: how to optimize them and control their appearance
* In-depth guide to fixing different kinds of shadow artifacts and light leaks
* Mental Ray controls in lights, shadows, shaders, and render settings
* Adjusting shadows in reflections, through transparency and fur, in real-time, and in other special cases


Download:

Digital-Tutors: Introduction to Lighting in Maya 2012


Digital-Tutors: Introduction to Lighting in Maya 2012
1 hour 46 mins | Video: VP6 (.flv) 1280*720 | Audio: MP3 44.1Khz mono 96kbps | Size 516MB
Genre: eLearning | Language: English

In this collection of lessons we will learn about the essential lighting tools and features found in Maya... Understanding how the various lighting tools in Maya work and behave is a very important skill for anyone who is getting started with this 3D application. In this series of lessons, we will discuss the different types of 3D lights found in Maya, and methods for easily aiming and controlling your lights. We will also explore some of the specialized attributes found in certain light types, we will discuss the different types of shadows available in Maya, we will see how we can add depth and mood to our scenes though the use of volumetric light rays, as well as many other lighting tools and concepts that will help you establish a solid foundation in Maya.

VIDEOS:
1. Introduction and project overview
2. Overview of various light types
3. Understanding common attributes of Maya lights
4. Essential attributes of Maya spot lights
5. Methods for easily aiming lights in Maya
6. Using the Show Manipulator Tool in Maya
7. Exploring the Barn Doors feature of spot lights
8. Working with ambient lights in Maya
9. Using Depth Map shadows in Maya
10. Rendering Ray Trace shadows in Maya
11. Controlling the Render Stats of Maya objects
12. Light and shadow linking in Maya
13. Creating volumetric light fog in Maya
14. Creating light glows and lens flares in Maya
15. Using gobos in Maya
16. Controlling reflection and refraction depth in Maya
17. Simulating illuminated light sources in Maya

More Info:
1 hrs. 46 min. | Released on June 1, 2011 | Project Files Included (22 MB)
Required Software: Maya 2012 and up

Home Page: _http://www.digitaltutors.com/11/training.php?pid=45

Download:

Mental Ray - Lighting and Shaders Rendering Techniques


Mental Ray - Lighting and Shaders Rendering Techniques
English | AVC1 1024?768 | MP3 128 Kbps | Size 1.34 GB
Genre: eLearning

In the second DVD of this series, Matt Hartle focuses on lighting, shaders, and High Dynamic Range Imaging (HDRI) within Mental Ray for Maya. Mental Ray supports most of Maya’s features, in addition to many others. This DVD shows you how to get the best use of Mental Ray to render fluids, particles, fur, geometry based paint effects, blurry reflections and refractions, area lights, contour rendering, and High Dynamic Range images.


Topic Covered:
* Lighting
* Shaders
* HDRI
* Image Based Lighting
* Reflections/Refractions
* Sub-surface Scattering

Chapter:
1. Introduction
2. Shadows
3. Volumetric Shadows
4. Fur
5. Area Lights
6. Command-Line Image Conversion
7. Blurry Reflections and Refractions
8. Contour Shader
9. High Dynamic Range Images
10. BONUS - Subsurface Scattering: Fast Simple
11. BONUS - Subsurface Scattering: Physical

Video codec: QuickTime
Video: MOV, SVQ3 Sorenson Video 3, 1846 kbps, 1024 768


Download:

Wednesday, January 11, 2012

Digital-Tutors – Facial Animation in Maya


Digital-Tutors – Facial Animation in Maya
2 hrs. 38 min. |Released on June 30, 2011 |Project Files Included (104 MB)
Required Software: Maya 2012 and up

In this collection of lessons we will learn tips an techniques for creating believable facial animations.

This course will cover the process of animating a face in Maya. We will build the animation step by step, covering time-saving and proficient techniques like smart blocking, using a checklist, how to work with reference, checking for arcs. We will even cover what to do when we encounter issues where an expression that was not anticipated calls for the control rig to be revised. By the end of this course, you we will be equipped with the knowledge you need to build your own facial animations that are convincing and entertaining.

21 videos in this course

Home PAGE: _http://www.digitaltutors.com/11/training.php?pid=65


Download:

The Gnomon Workshop - Maya Dynamics Outer Space Environments


The Gnomon Workshop - Maya Dynamics Outer Space Environments
Software : Maya | Size 2.58 GB

In this DVD, John presents the entire process of creating an outer space effects sequence. Starting with a space ship and a camera move, John takes the viewer through a step-by-step look at how to create a sequence that includes following a space ship as it breaks free of a tractor beam, launches out of planetary orbit, then flies through a field of asteroids and starbirth nebula clouds. John uses Maya's Dynamics system to build elements in the shots, demonstrating their use within the shot environment. He shows how to use cloud particles as a volume surface on which to project shaders to simulate nebulas that can be both stunning backgrounds and realistic clouds that can be flown through. John also walks you through a series of simple effects that add dynamic detail to the shots: sprite-stars, tractor beams, explosions, an energy field and an asteroid field. This lecture will enable you to create fantastic outer space shots that push the scope of imagination.


Homepage: _http://www.thegnomonworkshop.com/store/product/175/


Download:

Digital-Tutors: Character and Scene Development in ZBrush


Digital-Tutors: Character and Scene Development in ZBrush
English | Team: iNKiSO | .Bin | Size 1.26 GB
Genre: Video Training

Create polished characters and more appealing scenes. Work creatively using a step-by-step approach to character and scene development in ZBrush and a time-saving workflow to haracter interaction, sculpting, texturing, composition, lighting, and rendering. Contains nearly 6 hours of self-paced training for artists using ZBrush and Maya.

INSTALLATION
a. Extract
b. Mount/Burn
c. Play & Learn


Download:

CG ACADEMY: Lighting&Rendering Fundamentals1 : Light&Colour Theory


CG ACADEMY: Lighting&Rendering Fundamentals1 : Light&Colour Theory
English | Size 3.4 GB | Genre: eLearning

This is the first DVD in a series that will teach you the theory and practical aspects of rendering and lighting within 3dsmax and Maya. This DVD focuses on the theoretical aspects of light and colour, such as light reflection, colour temperature, dynamic range and much more. This DVD forms a solid foundation on which the lessons of DVD2 and beyond will be built.

This DVD is aimed at a user that has a basic practical knowledge of 3dsmax or Maya. It does not require any previous knowledge about rendering and lighting and aims to teach the topic from the ground up.


Download:

Making Turntable Animations - Maya Techniques with Alex Alvarez


Making Turntable Animations - Maya Techniques with Alex Alvarez
English | AVC1 1280x800 | MP3 128 Kbps | Size 1.15 GB
Genre: eLearning

This tutorial demonstrates a simple, yet effective, solution for creating dynamic turntables. Utilizing Maya's two-node camera, motion path animation provides a flexible way to move the camera around the model. Precise and cycling rotations are combined with a moving camera, to allow for various views of the model in a single turntable. We begin the tutorial by creating a three-point lightrig using raytraced shadows and Mental Ray. This tutorial demonstrates how to render a Maya animation from the Command Line. While it is possible to render from within Maya using Batch Render, there are several advantages to avoiding this approach. More memory is available to the renderer when Maya is closed which is often a necessity. But furthermore, command line rendering simplifies the process of managing rendered frames, network rendering and the batch rendering of multiple scenes. This tutorial also demonstrates how to render the wireframe/topology of the model on top of the shaded turntable animation.

When presenting work, especially on a reel, viewers will expect to see not just the finished result, but also how it was achieved. Clean, efficient and animation friendly topology is critical, therefore presenting that aspect of your work is expected.

We look at a variety of wireframe styles and composite them in After Effects.

Topics Covered:
3-point Lighting
Raytraced Shadows
two-node camera
Rendering from the Command Line
Wireframe Rendering
Compositing in After Effects

Chapters:
3-point Lighting and 2-node Camera Motion
Rendering from the Command Line
Wireframe Rendering Techniques

Screan Shoots


Download:

Tuesday, January 10, 2012

[HOT] 25 DVD - Eat3D Ultimate Tutorials Collection


Eat3D Ultimate Tutorials Collection
Size 30 GB


Download:


1- Eat3D Autodesk 3ds Max 101
Size 1.47 GB


Here

2- Eat3D Autodesk 3ds Max 2011-CAT, Slate, Viewport Canvas, Rendering, and More
Size 303.4 MB


Here

3- Eat3D Character Skinning Skinning A Low-Res Character For Animation
Size 563.76 MB


Here


4- Eat3D Old Damaged Pillar
Size 1.06 GB


Here

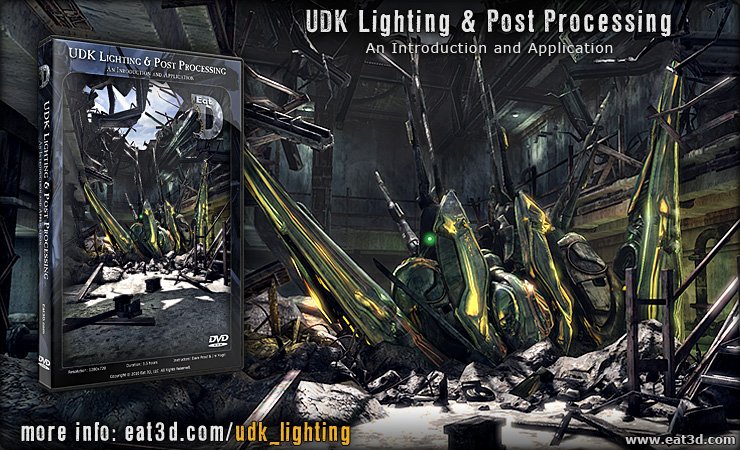
5- Eat3D UDK Lighting & Post Processing
Size 1.06 GB


Here

6- Eat3D UnrealScript - An Introduction and Application
Size 287.40 MB


Here

7- Eat3D Training Video - Unreal Cascade - An Introduction and Application
Size 621.49 MB


Here

8- Eat3D Unreal Development Kit - An Introduction and Application
Size 1.47 GB


Here


9- Eat3D Unreal Development Kit 2 - Creating Cinematics & Environmental Effects
Size 997.32 MB


Here


10- Eat3D Unreal Kismet - An Introduction and Application
Size 528.30 MB


Here


11- Eat3D Unreal Materials An Introduction
Size 606.93 MB


Here

12- Eat3D Unreal VFX - Material Transitions
Size 589.54 MB


Here

13- Eat3D ZBrush 3.5 - A Comprehensive Introduction
Size 651.09 MB


Here

14- Eat3D ZBrush Hard Surface Techniques
Size 1.22 GB


Here

15- Eat3D Live Action and CG 2 - HD Video in 3D
Size 2.83 GB


Part 1
Part 2
Part 3
Part 4
Part 5
Part 6
Part 7
Part 8


16- Eat3D Low-Res Character Production
Size 951.65 MB


Part 1
Part 2
Part 3


17- Eat3D Next-Gen Texturing Techniques
Size 1.7 GB


Part 1
Part 2
Part 3
Part 4


18- Eat3D Portrait Production - Creating a Realistic Portrait in Maya
Size 623.07 MB


Here

19- Eat3D The Fountain High Res
Size 1.52 GB


Here


20- Eat3D Live Action CG 3 A Comprehensive Guide to Compositing
Size 1.22 GB


Here

21- Eat3D Thinking Particles Part 1 A Comprehensive Introduction
Size 770.89 MB


Here


22- Eat3D ZBrush 3.5 - Character Production
Size 1.19 GB


Here


23- Eat3D ZBrush 4 - New Features - A Comprehensive Overview
Size 583.51 MB


Here


24- Eat3D Next Gen Facial Rigging for Games
Size 593.8 MB


Here

OR

Size 585 MB

Part 1
Part 2
Part 3

25- Eat3D The Fountain Low Res UVing and Baking
Size 2.35 GB


Part 1
Part 2
Part 3
Part 4
Part 5
Part 6


Friday, January 6, 2012

Digital-Tutors – Creative Development: Modeling a Cowgirl Character in Maya and Silo with Antony Ward


Digital-Tutors – Creative Development: Modeling a Cowgirl Character in Maya and Silo with Antony Ward
Advanced | 3h 05m | 1018 MB | Project Files 11 MB | Required Software: Silo 2.2, Maya 2012

In this tutorial we will explore how to build a stylised cowgirl character using subdivision surfaces. Throughout these lessons we will explore the use of subdivision surfaces to help us quickly create a stylized cowgirl character. We will begin with a base mesh before posing her and adding clothing and detail. The result will be a highly detailed model ready for textures and rendering that can be used in an illustration or even animation. Although we will primarily be using Silo throughout the tutorial, the techniques taught in these lessons can be followed along using any subdivision surfaces software.

Home: _http://www.digitaltutors.com/11/training.php?pid=618


Download:

Digital-Tutors - Creative Development: Photorealistic Time-Lapse Animation and Rendering in Maya and modo with Martin Mayer


Digital-Tutors - Creative Development: Photorealistic Time-Lapse Animation and Rendering in Maya and modo with Martin Mayer
Size 1.25 GB | Language: English | Level: Advanced | Duration: 2h 38m | Video: VP6 (.flv) 1280x720 | Audio: MP3 44.1KHz mono | Genre: eLearning

In this tutorial we will learn the efficient use of tools and techniques for creation of a time-lapse video. Throughout these lessons we'll delve into the animated growth of a tree branch as a time-lapse video. We'll learn everything from modeling, texturing and shading to the animation and final compositing. By the end of this tutorial, you'll have a better understanding of how you can employ efficient and productive techniques for a time-lapse video that can be used when up against a tight deadline.


Download:

Digital-Tutors - Pipeline integration with Mudbox 2012 and Maya


Digital-Tutors - Pipeline integration with Mudbox 2012 and Maya

In this series of lessons we will discuss a variety of ways that we can work efficiently between Mudbox and Maya. Mudbox and Maya are very complementary packages. Maya gives us the ability to build up our models, rig and animate them, and render them. But Mudbox allows us to use a much more artistic approach to shaping and sculpting our models. It also allows us to paint textures very quickly and with a lot of power. By leveraging these two applications together, we can really create a solid workflow. In this course we'll look at ways to get geometry and textures back and forth between Maya and Mudbox.


Download:

 
eXTReMe Tracker